The Ultimate Guide to YouTube Shorts Size and Dimensions
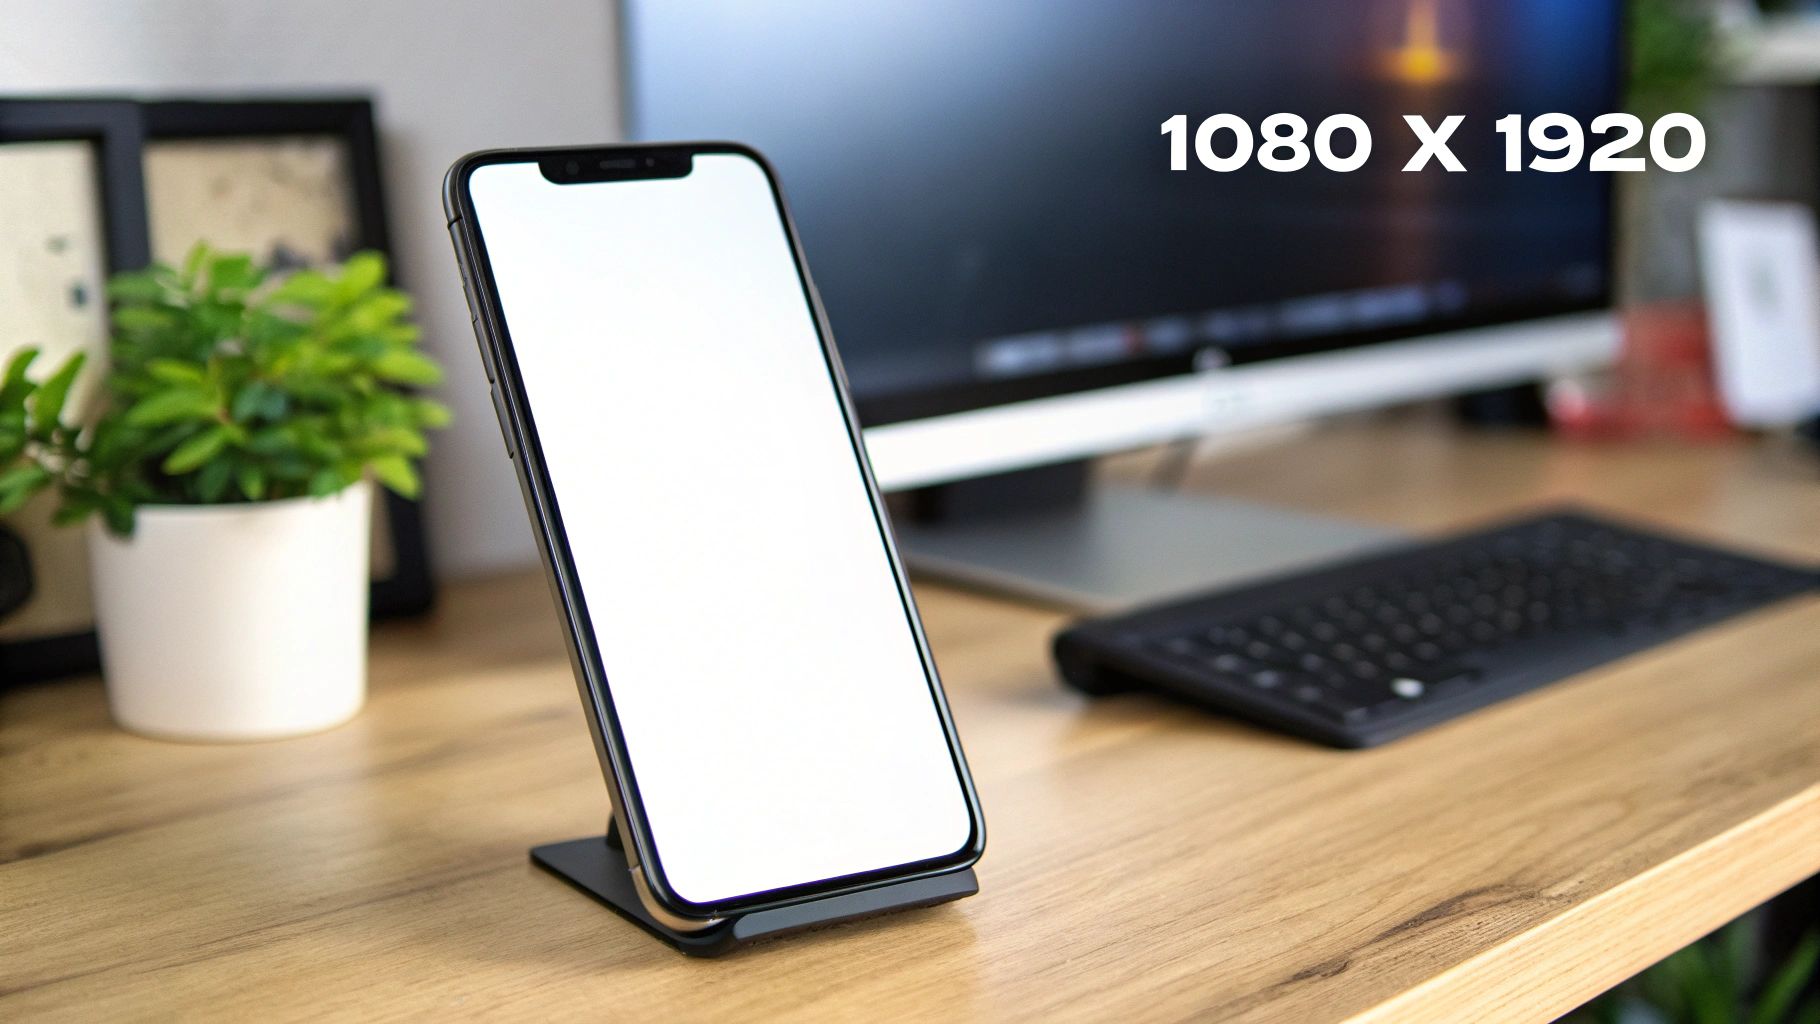
When you’re making a YouTube Short, the magic numbers to remember are an aspect ratio of 9:16 and a resolution of 1080x1920 pixels. Getting this right is your first, most crucial step. It ensures your video looks professional and performs the way it’s supposed to.
Getting Your YouTube Shorts Size Right The First Time
Picture the YouTube Shorts player as a tall, thin canvas built for one thing: your phone. This isn't the place for your cinematic widescreen footage. Shorts are designed from the ground up to be viewed vertically, and if you upload a video in the correct dimensions, it’ll fill the entire screen beautifully.
Why does this matter so much? Because a perfectly framed video feels natural on the platform. It grabs attention without any ugly black bars or weird cropping, which can make viewers scroll right past. It’s a non-negotiable part of the game.
For a deeper dive into making your content work for you, a good creator's guide to YouTube can offer some fantastic tips on optimising your videos to maximise both reach and revenue.
Your Technical Cheat Sheet
Let's cut to the chase. There are four technical specs you absolutely need to nail for every single Short you create. Think of them as the fundamental rules of the platform. Stick to these, and you'll be giving the YouTube algorithm exactly what it wants to see, helping it push your content to new viewers.
Following these technical specs isn't just about ticking boxes. It’s about giving your content the best possible shot at success. From the very first frame, a correctly formatted video tells both the viewer and the algorithm that you know what you're doing.
For a quick and easy reference, I've put all the essential details into the table below. Use it as a pre-flight checklist before you hit upload.
YouTube Shorts Technical Specifications At a Glance
Here’s a simple breakdown of the core requirements to ensure every Short is perfectly optimised.
| Specification | Requirement |
|---|---|
| Aspect Ratio | 9:16 (Vertical) |
| Resolution | 1080 x 1920 pixels |
| Max Duration | 60 seconds |
| Max File Size | 100 MB |
Keep these four pillars in mind, and you'll have a solid technical foundation for creating Shorts that look fantastic every time.
Why Your Aspect Ratio and Resolution Make or Break a Short
Think of your Short’s aspect ratio as the canvas for your art. If you try to stuff a wide, landscape painting into a tall, skinny frame, you’ll end up with huge, awkward gaps. That’s exactly what happens when you upload a video with the wrong YouTube Shorts size – the platform just fills the empty space with ugly black bars.
This isn’t just a small visual hiccup; it’s a big deal. Those black bars scream to viewers that your content wasn't actually made for the Shorts feed. It looks unprofessional and out of place, which is often all it takes for someone to swipe away without a second thought. On the other hand, a perfectly sized 9:16 Short feels completely natural. It fills the entire screen, pulling the viewer in and keeping them there.
The Problem with Black Bars
When you upload a standard horizontal (16:9) video, YouTube does its best to make it fit, but the result is far from ideal. It creates an instant disconnect for the viewer.
- Wasted Screen Space: The black bars literally shrink your video. Details become harder to see, and the whole thing just loses its punch.
- Lower Perceived Quality: It looks like a lazy afterthought, not something you carefully crafted for the Shorts audience.
- Reduced Watch Time: People scrolling through Shorts expect immersive, full-screen videos. Give them anything less, and they’ll just keep scrolling.
Just look at a creator like MrBeast – you’ll never see a poorly formatted video from him. His Shorts are always framed perfectly in 9:16, using every last pixel to deliver a high-energy experience that glues viewers to their screens. This is a huge part of his success. For a deeper dive, check out our guide on the YouTube Shorts aspect ratio.
Why 1080x1920p Is the Sweet Spot
Once you’ve got the frame right, the quality of the picture itself—the resolution—is just as important. You could technically get away with a lower resolution, but 1080x1920 pixels is the gold standard for a very good reason. It looks sharp and clear on modern phone screens without creating a gigantic file that takes forever to upload.
Getting this balance right is key. As the platform gets more crowded, quality is what will make you stand out. And make no mistake, YouTube Shorts is a behemoth, hitting over 200 billion daily views as of early 2026. In the UK, recent data showed that views per video on YouTube shot up by 76% in 2026, and that was with only a small 4% increase in weekly posts. It just goes to show that optimising for quality, including resolution, is far more impactful than just churning out content. Learn more about these YouTube statistics and their impact.
By mastering both aspect ratio and resolution, you ensure your video doesn't just show up on the Shorts feed—it belongs there. It’s about creating a seamless viewing experience that feels intentional and professional.
To make sure your Shorts look fantastic and grab viewers on the move, it’s worth understanding the nuts and bolts of creating videos for mobile. This foundational knowledge helps you sidestep common mistakes and create content that genuinely connects with a mobile-first audience.
Mastering the Safe Zones for Text and Graphics
Getting the YouTube Shorts dimensions right is a great start, but it's only half the story. Think of it like this: you've painted a brilliant masterpiece, but then someone puts it in a frame that covers up all the best bits. That’s exactly what happens if you ignore the Shorts interface.
Your video canvas might be a full 1080x1920 pixels, but your audience never sees that entire space completely clear. YouTube overlays the channel name, like button, comment icon, and video title right on top of your content, mostly along the bottom and right-hand side. If you put any crucial text or graphics there, you’re basically guaranteeing they won't be seen properly.
Understanding the UI Overlay
This isn't just a small detail—it's a core principle of designing for the platform. Key parts of your video, like subtitles, a call-to-action, or even the main subject of your shot, can easily get lost behind these interface elements, making them unreadable or just plain hidden.
To sidestep this common pitfall, you have to work within the “safe zone.” This is the central part of the screen that stays completely visible, no matter what. Keeping all your essential visuals and text tucked neatly inside this area ensures your message comes across loud and clear.
This diagram helps visualise the correct canvas for Shorts, emphasising the vertical format that’s built for mobile viewing.
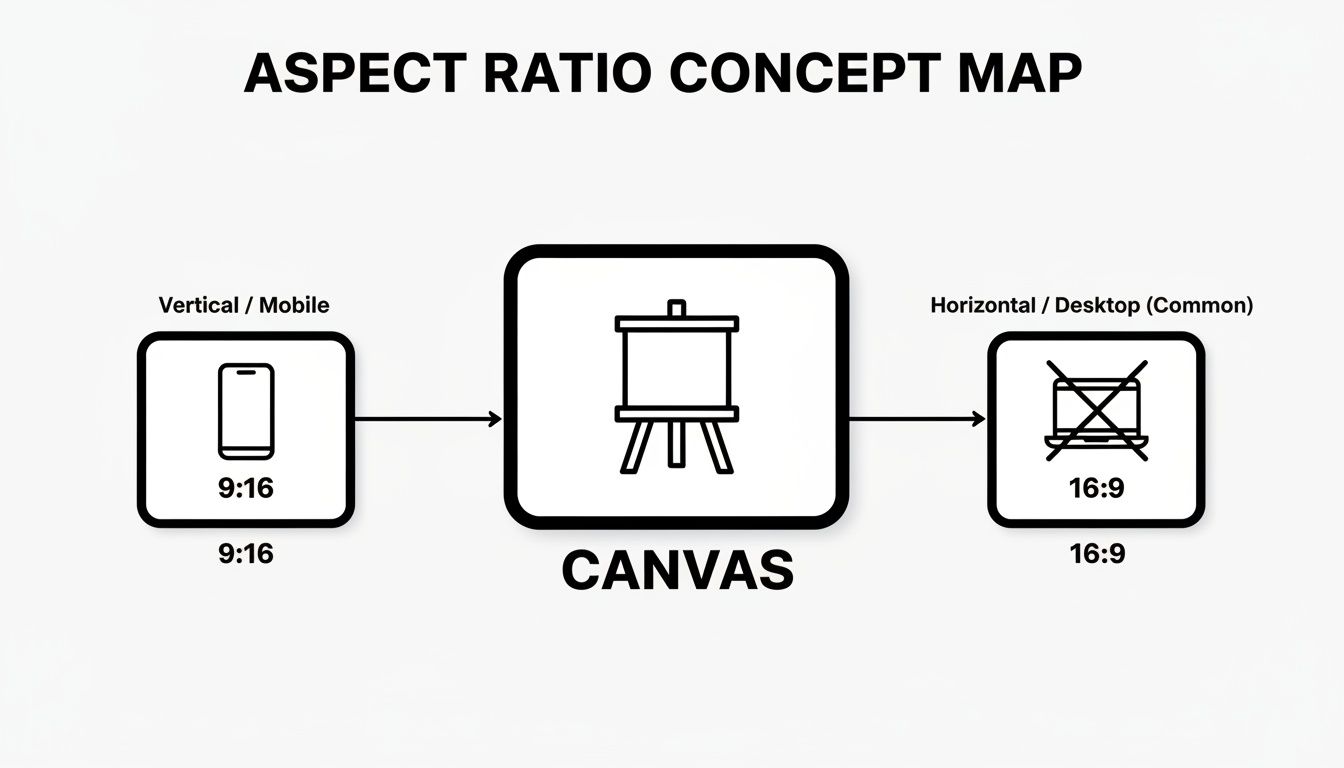
It’s a simple reminder: a vertical 9:16 aspect ratio is your target for Shorts, whereas the traditional horizontal 16:9 format just won’t work.
Your Visual Blueprint for Success
As a solid rule of thumb, always aim to keep your vital text and graphics within the central 70-80% of the screen. This gives you a decent buffer around the edges where the interface elements live.
Treat the edges of your video as a "no-go" zone. Anything you put there is at risk of being covered up, which immediately cheapens the look of your content and dilutes your message.
A good way to picture this is to imagine a smaller rectangle drawn inside your main 1080x1920 frame. Everything that the viewer absolutely must see should fit comfortably inside that inner box.
A Practical Example
Let’s bring this to life. A creator named Alex posts cooking Shorts. In his first video, he put the list of ingredients right at the bottom of the screen. Almost immediately, viewers complained that they couldn’t read it because his channel name and the video description were completely blocking it.
He quickly learned his lesson. For his next video, Alex tweaked his template and moved the text box up, positioning it squarely in the middle of the frame. The difference was night and day. Engagement shot up because people could actually follow the recipe, leading to way more likes, shares, and happy comments. It was a tiny change that made his content a thousand times more effective.
Getting Your Export Settings Spot On
You’ve done the hard work of filming and editing your Short. Now comes the final, crucial step: exporting. This is where so much of that effort can be undone. A wrong click here or a poor setting there can leave you with a blurry, pixelated mess that doesn't do your content justice.
Getting your export settings right is like perfectly wrapping a gift. You've picked out the perfect item (your edited video), and now you need to put it in the right box so it arrives looking fantastic. These settings are that box, ensuring your Short lands on YouTube looking as crisp and clean as it did in your editor.
The Basics That Every Editor Shares
No matter what software you’re using, a few key technical settings form the foundation of a great export. Think of these as the universal language that video editors use to talk to YouTube. Get these right, and you're already 90% of the way there.
- Codec: H.264 (sometimes called AVC) - This is the undisputed king of online video. It gives you a brilliant balance, keeping your video quality high while compressing the file size down to something manageable. It's the standard for a reason.
- Audio Codec: AAC-LC - For sound, AAC is the go-to. It keeps your audio sounding clear and sharp without adding unnecessary bulk to your file.
- Frame Rate: 24-60 FPS - The golden rule here is simple: match the frame rate you filmed in. Most people shoot at 25, 30, or 60 FPS, and YouTube handles all of these perfectly.
Tailoring Settings for Your Favourite Software
While the core principles don't change, the exact location of these settings can look a little different depending on your chosen editing tool. If you're still deciding on the right editor for you, you might find our guide to the best software for editing YouTube videos helpful.
Here’s a quick-start guide to dialling in the perfect export settings on some of the most popular platforms out there.
Recommended YouTube Shorts Export Settings
Getting the export right means translating universal best practices into the specific menus of your software. Each program has its own quirks, but the goal is always the same: a high-quality, vertically-oriented MP4 file. This table breaks down the ideal settings for three of the most popular editors, giving you a clear-cut template for success.
| Setting | Premiere Pro | DaVinci Resolve | CapCut |
|---|---|---|---|
| Format/Container | H.264 (.mp4) | MP4 | MP4 (default) |
| Resolution | 1080x1920 | 1080x1920 Vertical | 1080p |
| Frame Rate | Match Source | Match Source | Match Source (30/60fps) |
| Bitrate | Target: 8-12 Mbps | Restrict to: 10,000 Kb/s | Automatic (Optimised) |
| Audio | AAC, 48000 Hz | AAC, 48000 Hz | AAC (default) |
By following these guidelines, you're telling your software exactly how to package your video for YouTube's algorithm. This removes any guesswork and ensures your Short is processed for the best possible playback quality every single time.
A Closer Look at the Settings
For Adobe Premiere Pro
When you hit the export button, the first thing you'll want to do is select H.264 as your format. In the ‘Video’ tab, double-check that your dimensions are set to 1080x1920 and the aspect ratio is on Square Pixels (1.0). The real secret sauce here is the bitrate; aim for a target bitrate somewhere between 8-12 Mbps. This gives you fantastic quality without creating a massive file.
For DaVinci Resolve
Head over to the ‘Deliver’ page. A good starting point is the "YouTube" preset, but you'll want to customise it. Change the Format to MP4 and the Codec to H.264. Ensure the Resolution is set to 1080x1920 Vertical. Under the ‘Quality’ settings, you'll see an option to "Restrict to"—set this to around 10,000 Kb/s (which is just another way of saying 10 Mbps) for a perfect balance of quality and size.
For CapCut (Mobile)
One of the reasons CapCut is so popular for Shorts is its simplicity. Before you export, just tap the resolution option at the very top of your screen. Set it to 1080p and make sure the Frame rate (usually 30 or 60fps) matches your project. That’s it! CapCut handles the tricky bitrate calculations for you, delivering a clean export every time.
At the end of the day, it doesn't matter which editor you use. The mission is always the same: export a high-quality H.264 file at 1080x1920. A healthy bitrate will preserve all the fine details you worked so hard on. Make these settings a habit, and you'll take all the guesswork out of uploading Shorts that look consistently professional.
Seeing It in Action: How Top UK YouTubers Do It

It’s one thing to talk about aspect ratios and safe zones, but seeing how the pros actually put these rules to work is where it all clicks. By checking out how top UK creators frame their content, you can pick up some brilliant, proven strategies for your own channel. These YouTubers aren’t just getting the dimensions right; they’re intentionally designing their Shorts to shine on a vertical screen.
The best creators know that a perfectly sized Short is the very first step to grabbing and holding a viewer's attention. When you nail the technical stuff, you create a seamless experience for your audience, which is everything on a platform where every second is precious.
Nailing the Frame in Different Niches
Let's break down how this works across a few different content styles, from quick-fire comedy to in-depth tutorials. Each niche brings its own set of challenges, but the fundamental principles of framing and respecting the safe zones are always the same.
Case Study 1: The Food Creator – @gordonramsay Gordon Ramsay's Shorts are a masterclass in making every pixel count. When he's walking through a recipe, you’ll notice that any text listing ingredients is always placed squarely in the centre, well clear of the UI elements at the bottom.
- Key Takeaway: He relies heavily on tight, close-up shots of the food being prepped. This makes the main action fill the entire vertical frame, pulling you right into the kitchen and making the content feel incredibly immersive, even on a tiny screen.
Case Study 2: The Tech Reviewer – @Mrwhosetheboss Arun Maini, better known as Mrwhosetheboss, often reviews the latest gadgets in his Shorts. He’s an expert at framing close-ups of phones so the product is always the hero of the shot. Even when he’s on screen, the tech stays in the visual centre, far from any buttons or captions that could block it.
- Key Takeaway: He uses big, bold text overlays in the middle third of the screen. This makes his key points easy to scan, which is perfect for anyone watching with the sound off.
By truly mastering the vertical format, these creators make sure every single part of the screen has a job to do. Their success proves that sticking to the correct YouTube Shorts size isn't a restriction—it's a creative framework for making a bigger impact.
Why This Kind of Polish Drives Growth
Getting your formatting right isn't just about looking good; it's about performance. Shorts are a massive discovery tool for new audiences, which makes your technical choices more important than ever before.
In fact, engagement on Shorts often edges out other platforms, clocking in at an average of 5.91% compared to TikTok's 5.75%. And with Shorts responsible for 35% of new channel discovery, a well-polished video is like rolling out a welcome mat for potential subscribers.
This focus on the small details is a direct line to growth. When you make sure your video is perfectly sized and keeps clear of the no-go zones, you're handing the YouTube algorithm a high-quality piece of content it's more likely to push.
If you're curious about turning those views into cash, have a look at our guide on YouTube Shorts monetisation. In the end, learning from the best gives you a clear blueprint for creating content that doesn't just look professional but performs brilliantly, too.
Bringing It All Together: Your Shorts Sizing Blueprint
We've covered a lot of ground, from pixels to aspect ratios. But at the end of the day, it all boils down to a simple, effective blueprint. Getting your YouTube Shorts dimensions right isn’t just about ticking boxes; it’s about giving your content that clean, professional edge that makes people stop scrolling.
Think about it – when you respect the platform's native vertical format, you're creating a much smoother, more immersive experience for your viewers. That little bit of extra care is what separates the amateurs from the pros and lays the groundwork for real channel growth.
Your Final Pre-Upload Checklist
Treat this like a pilot's final check before take-off. Run through these three points before every single upload, and you'll be light years ahead of most creators.
- Embrace the Golden Ratio: Your go-to should always be a 9:16 aspect ratio, which translates to 1080x1920 pixels. This is the standard for a reason – it guarantees that perfect, full-screen look every time.
- Play It Safe: Remember those safe zones. Keep your crucial text, logos, or any important visuals away from the bottom and right-hand edges, so the YouTube interface doesn't cover them up.
- Watch the Clock: Make sure your video is under 60 seconds. If it's even a fraction of a second over, YouTube won't recognise it as a Short, and all your hard work could be for nothing.
When you get the technical stuff right, it frees you up to focus on what really matters: being creative. Once you stop worrying about black bars or cropped text, you can pour all that energy back into making brilliant content that people actually want to watch.
You now have the complete blueprint to create with total confidence. Go put this into practice on your next video. Start making Shorts that don't just look great, but are properly optimised to get discovered and help you build your audience.
Frequently Asked Questions
Even with the best-laid plans, a few tricky questions always pop up right when you’re about to hit ‘upload’. Let’s clear up some of the common sticking points creators run into with YouTube Shorts specs, so you can keep your workflow moving smoothly.
Nailing these details is about more than just getting the technicals right; it's about making sure your content feels native to the Shorts feed and has the best possible chance of succeeding.
Can I Upload a Square Video as a Short?
Technically, yes. You can upload a square video (1:1 aspect ratio), and if it’s under 60 seconds, YouTube will file it away as a Short. But you really shouldn't. The platform will automatically pad it with black bars at the top and bottom to force it into the vertical player.
This immediately shatters the full-screen, immersive feeling viewers are there for. All that wasted screen space makes your video look out of place, which is often a one-way ticket to a quick swipe-away and lower watch time compared to a proper 9:16 video.
What Happens If My Short Is Longer Than 60 Seconds?
If your video ticks over the 60-second limit—even by a split second—YouTube won't recognise it as a Short. Instead, it’ll just be treated as a regular vertical video on your channel.
This is a massive deal. It means your video won't get pushed into the Shorts feed, which is the main discovery engine for this format. Going over the time limit essentially cuts off your video's main artery for reaching new viewers. Always, always double-check your final export duration.
Does the YouTube Shorts Thumbnail Size Matter?
The thumbnail game for Shorts is a bit of a curveball. While you can still pick a frame from your video to act as its thumbnail, any polished, custom thumbnail you upload will only ever be seen on your main channel page. It will not show up in the Shorts feed itself, where almost all discovery happens.
In the feed, YouTube just shows a short, looping preview pulled directly from the video. Think of the first two to three seconds of your Short as your real thumbnail. You have to make them visually arresting enough to stop someone mid-scroll.
What Is the Maximum File Size for a Short?
When uploading from a mobile device, the official cap for a YouTube Short is 100MB. You can technically upload larger files from a desktop, but it's good practice to aim for that mobile limit anyway. With the right export settings and a sensible bitrate, you can easily keep your file size down for quick, painless uploads without sacrificing any noticeable quality.