Upload Video YouTube: A Creator's Guide
Before you even think about hitting that upload button, there are a few things you need to sort out on your end. It’s a bit like a pre-flight check for your video. Getting these details right from the start can make a huge difference in how your video looks and how easily people can find it.
This isn’t about getting lost in technical jargon. It’s about making a few smart, simple choices to give your video the best possible launch.
Preparing Your Video for a Flawless Upload
The journey to a successful YouTube video begins long before you see that upload progress bar. The groundwork you lay right after your final edit is what separates a smooth, high-quality upload from a frustrating one.
Think of it this way: simply exporting a file from your editor and throwing it at YouTube is a massive missed opportunity. A little bit of prep work ensures a seamless upload and gives your video a crucial technical edge right out of the gate.
Nailing Your Export Settings
First things first: the quality of your video file is everything. While YouTube is pretty flexible with the formats it accepts, sticking to its recommended settings is the best way to guarantee your audience sees your work as you intended. A dodgy export can lead to ugly pixelation, audio that’s out of sync, or an upload that takes forever.
For most people, the magic combination is an MP4 container with the H.264 video codec and AAC audio codec. This trio strikes a perfect balance between fantastic quality and a manageable file size, which is ideal for both uploading and streaming.
But if you want to get a bit more strategic, think about your resolution.
For example, a gaming creator like Jacksepticeye, whose channel is full of fast-paced action, might export his gameplay in 1440p or even 4K. This isn't just for show. Uploading at a higher resolution can push YouTube to use its more advanced VP9 codec, which actually makes the video look sharper and cleaner even when someone watches it at 1080p. On the flip side, a lifestyle vlogger whose content is mostly talking-head shots might stick with a standard 1080p export. The quality is still brilliant, but the smaller file size means a much quicker upload.
My Two Cents: Your export resolution is a strategic choice. Going for 1440p or higher can unlock better video quality through the VP9 codec, but a solid 1080p is still a reliable and efficient option for most types of content.
To make things easy, here’s a quick rundown of the ideal settings to aim for when you’re exporting your final video file.
YouTube Recommended Video Export Settings
| Setting | Recommended Specification | Why It Matters |
|---|---|---|
| Container | MP4 | The most common and widely supported format, ensuring compatibility across devices. |
| Video Codec | H.264 | Provides an excellent balance of high-quality compression and relatively small file size. |
| Audio Codec | AAC-LC (Low Complexity) | Delivers high-quality audio compression, making it the standard for YouTube. |
| Frame Rate | Match the source (24, 25, 30, 48, 50, 60 fps) | Keeps motion looking smooth and natural, just as you recorded it. |
| Resolution | 1080p (1920x1080) or higher | Higher resolutions (like 1440p or 4K) can trigger the superior VP9 codec for better quality. |
| Aspect Ratio | 16:9 | The standard widescreen format for YouTube, preventing black bars on the sides of your video. |
Sticking to these guidelines helps YouTube process your video faster and ensures it looks its absolute best once it's live.
Give Your File a Subtle SEO Boost
Here’s a trick that so many creators miss: the name of your video file itself. Before you drag final_cut_final_v4.mp4 into the uploader, take a second to rename it. If your video is a review of the latest camera gear, call the file something like new-sony-camera-review-2024.mp4.
This won't magically send your video to the top of the search results, of course. But it does give YouTube's algorithm an early, tiny clue about what your content is about. It's a simple, zero-cost optimisation that contributes to your bigger SEO picture.
Getting All Your Ducks in a Row
Beyond the technical bits, having all your other assets ready to go will make the whole process much less of a headache. This is especially true for UK-based creators, where the audience is incredibly engaged—we’re talking more than 5,700 views per person each month. With that level of attention, every little detail counts.
Here’s a quick checklist of things to have ready before you upload:
- Lock in Your Final Edit: Make absolutely sure your video is 100% finished. Having to re-upload because you spotted a mistake is a pain and can mess with your channel’s momentum. If you're looking for the right tools, check out our guide on the best software for editing videos for YouTube.
- Get Your Transcript Ready: Having a transcript on hand makes adding subtitles or closed captions a breeze. This is a massive win for accessibility and can also give your SEO a nice little bump. A detailed content creator's transcription guide can be a lifesaver here, showing you how to do it efficiently.
- Design That Killer Thumbnail: Don’t leave your thumbnail as an afterthought. Create a custom, eye-catching thumbnail in advance so it’s ready to go. This makes sure your video looks professional and on-brand from the second it goes live.
Navigating the YouTube Upload Process
Right, you've got your video file edited and ready to go. Now for the main event: getting it into YouTube Studio. This is your mission control, the place where you bring your content to life on the platform. The experience is a bit different on a computer versus your phone, and honestly, each has its place depending on what you're trying to do.
Let’s walk through how it works on both, looking at some real-life situations where you’d pick one over the other.
The Desktop Workflow: Your Go-To for Polished Videos
For most creators, especially those making detailed, longer videos, the desktop uploader is king. It’s packed with features that give you maximum control. When you log into YouTube Studio on your computer and hit that "Create" button, you’re not just uploading a file—you’re kicking off a comprehensive setup process.
Think about a creator like Marques Brownlee (MKBHD). His deep-dive, 20-minute reviews of new smartphones are meticulously crafted. He uses the desktop uploader to add precise video chapters so viewers can skip to sections like "Design," "Camera," or "Battery Life." This level of detail is only possible through the comprehensive desktop interface.
This is the central hub where your video’s journey from a file on your hard drive to published content is managed.
The clean layout of YouTube Studio gives you direct access to everything you need, from uploading and analytics to monetisation settings.
My Take: The desktop uploader is your command centre. For any serious, long-form content, this is where you want to be. It gives you the full suite of tools—chapters, end screens, cards—that are crucial for keeping people watching and guiding them to your other videos.
Once you drag your file in, the upload chugs away in the background. This is brilliant because it means you can get straight to work on the important stuff while it processes. YouTube walks you through a few key stages:
- Details: This is your first and most important stop. Nail your title, description, thumbnail, and tags here.
- Video elements: Add subtitles (crucial!), end screens, and info cards to boost engagement.
- Checks: A handy automated step where YouTube scans for any copyright red flags and checks if it’s suitable for ads.
- Visibility: The final step. Decide if you want to publish it instantly, schedule it for a specific time, or keep it private.
This structured approach is a lifesaver, making sure you don't forget any of the little optimisations that make a big difference.
The Mobile Advantage: Speed and Spontaneity
While the desktop gives you control, the YouTube mobile app is all about speed. It’s perfect for content that needs to be timely, raw, and authentic.
Picture a food blogger like Mikey Chen at a buzzing London market. He finds an amazing street food stall. He can film a quick 30-second vertical clip, add a trending song from YouTube's library, and upload it as a Short right there from his phone. This "in-the-moment" energy is difficult to replicate with a desktop workflow.
Learning how to upload YouTube Shorts effectively is its own skill, as the tools and audience expectations are quite different from standard long-form video.
The mobile upload process is stripped back for speed, focusing on the essentials:
- Quick Trims: Easily snip the start or end of your clip without needing a full-blown editor.
- Music & Sound: Get instant access to YouTube’s huge library of licensed audio.
- Text & Filters: Add some simple text overlays or a quick filter on the fly.
It’s built for creators on the move who need to get content out fast to jump on a trend or share a fleeting moment.
A Smart Pre-Upload Checklist
No matter which platform you end up using, having a little pre-upload ritual can save you a world of headaches. Getting your ducks in a row before you even open YouTube Studio makes the whole process much smoother.
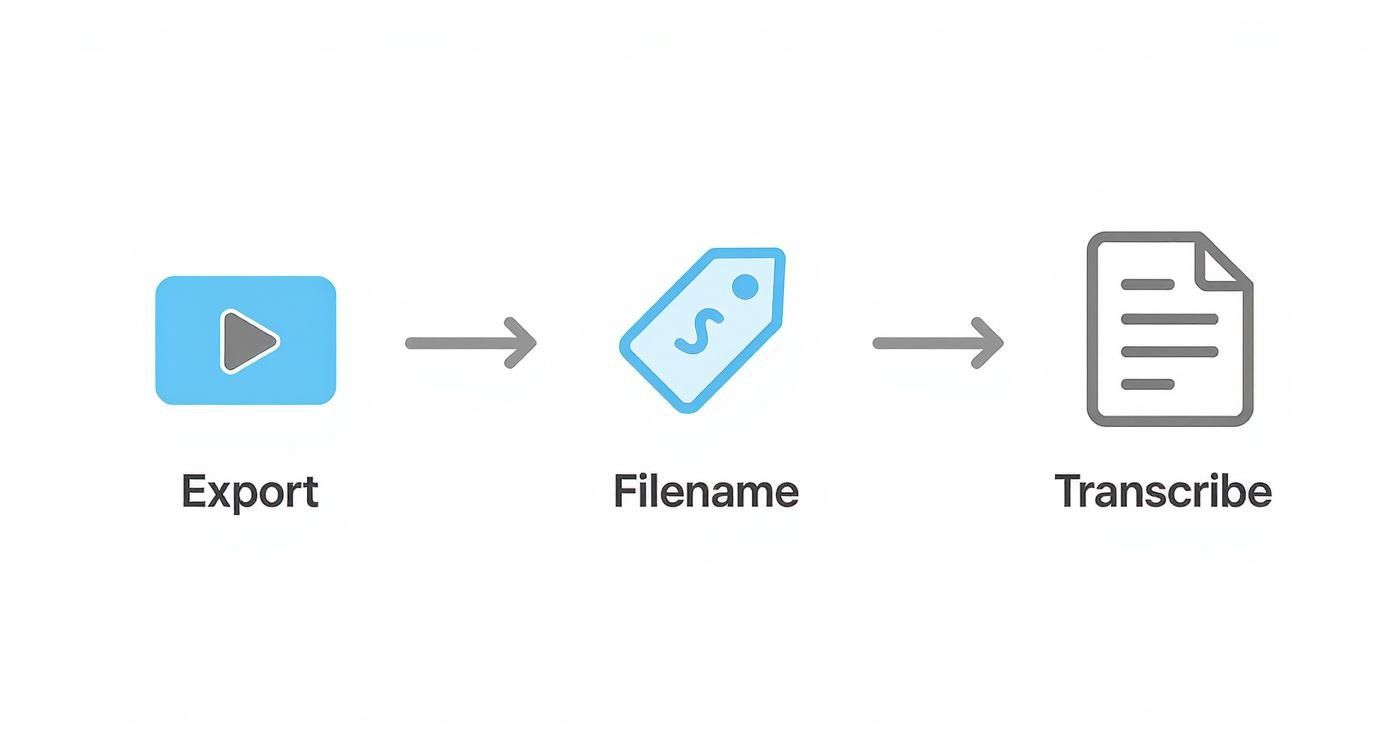
This simple workflow shows the key prep stages: exporting your final video, naming the file properly for SEO, and getting it transcribed for captions.
By following this sequence—export, rename, transcribe—the actual upload becomes the easy part, freeing you up to focus on the creative stuff like writing a killer description.
When you have your final video file, a keyword-optimised filename, and a transcript ready to paste in, uploading feels less like a chore and more like the final, satisfying step in your creative process. This prep work is the foundation for helping people discover your video.
Crafting Metadata That Drives Discovery
Getting your video file onto YouTube is just the first domino. The real challenge, and frankly where a lot of creators drop the ball, is making sure people can actually find it. This is where your video's metadata—the title, description, and tags—transforms from a simple text box into your most powerful tool for discovery.

Think of your metadata as the signposts guiding both viewers and YouTube’s algorithm to your content. A weak, vague title like "Our Trip" is a dead end. But a punchy, search-friendly title like "10 BEST Things to Do in Edinburgh | Scotland Travel Vlog" is specific, compelling, and full of keywords people are genuinely typing into the search bar.
Writing Titles That Get Clicks
A great title has to do two things at once: satisfy the YouTube algorithm and convince a human being to click. It’s a delicate balance between searchable keywords and genuine curiosity.
Start by putting yourself in your viewer's shoes. What would they actually search for? Don't just guess; a bit of research here goes a long way. For anyone serious about growing their channel, digging into the various YouTube keyword research tools can uncover what your audience is hungry for, giving you a huge leg up.
Once you’ve got your main keywords, craft a title that sparks intrigue or promises a clear benefit.
- Weak Title: "Making Sourdough"
- Strong Title: "My NO-KNEAD Sourdough Recipe for Absolute Beginners"
The second title instantly tells you who it's for ("beginners"), highlights a massive benefit ("no-knead"), and uses personal language ("My") to start building a connection before they even press play.
The Power of a Well-Crafted Description
The video description is prime real estate that so many people waste. Yes, only the first few lines are visible before a viewer has to click "Show more," but that initial text is absolutely critical for hooking them in and giving the algorithm more context.
Your first one or two sentences should be a snappy summary of the video, weaving in your main keywords naturally. After that, you can flesh it out with more detail. A truly effective description is organised and offers real value.
Here’s a structure that works wonders:
- A strong opening paragraph: Briefly explain what the video is about and what someone will get out of watching it.
- Video chapters: Use timestamps (e.g., 00:00 Intro, 01:25 Tip One) to break your video into easy-to-navigate sections. This is a massive win for viewer experience and can even lead to "key moments" showing up in Google search results.
- Helpful links: This is the perfect spot for affiliate links to products you mentioned, links to your social media, or a call-to-action to subscribe. Just be sure to be transparent about any affiliate links.
For instance, a tech channel like Linus Tech Tips uses its description to list every single piece of hardware reviewed in the video, with affiliate links for each. This turns their description from a simple summary into a genuinely useful resource for their viewers.
Demystifying Tags and Why They Still Matter
Let’s be honest, tags aren't the powerhouse they used to be. But they aren't useless either. They still play a role in helping YouTube categorise your video, especially if your title or description contains words that could be a bit ambiguous. The best approach is to use a healthy mix of broad and specific tags.
Imagine you've just uploaded a video on making a vegan shepherd's pie. Your tags might look something like this:
- Specific Tags: "vegan shepherd's pie recipe", "how to make lentil shepherd's pie", "easy plant-based dinner"
- Broad Tags: "vegan cooking", "healthy recipes", "comfort food", "what I eat in a day"
This combination helps YouTube nail down the exact topic of your video while also connecting it to wider interest categories, boosting its chances of being recommended alongside similar content.
Don't overthink it. Fill the tag box with relevant terms, putting your most important keywords first, but focus the bulk of your energy on the title and description.
Your Thumbnail: The Ultimate Click-Magnet
Finally, we get to what is arguably the most important piece of metadata: your thumbnail. You could have the most amazing video in the world, but if it's wrapped in a boring thumbnail, it will go unwatched. It’s a visual promise of your video's content and is often the single biggest factor in whether someone clicks.
UK tech creator Mrwhosetheboss (Arun Maini) is an absolute master of this. His thumbnails are a case study in what works:
- Clean Graphics: He uses high-contrast colours and minimal text, so you understand the core idea in a split second.
- Expressive Faces: A clear shot of his face showing an emotion—like surprise or curiosity—creates an immediate human connection.
- Focus on the Product: The gadget or piece of tech is always front and centre, clear and recognisable.
In a crowded feed, that combination is incredibly powerful. As a creator, you're competing in a vast ocean of content. Statistics suggest that as of 2025, roughly 1.1 million videos are uploaded every single day. Channels with fewer than 10,000 subscribers are responsible for about 61% of these uploads, and with mobile devices accounting for over 72% of this volume, your thumbnail has to pop on a small screen. You can find more insights on these YouTube upload statistics on mconverter.eu.
Your thumbnail and title need to work as a team. They should complement each other to tell a compelling micro-story that makes a potential viewer think, "I have to see what this is about." Nailing that one-two punch is the real secret to turning an upload into a discovery.
Using Visibility and Scheduling Strategically
That rush you get hitting ‘Publish’ the second your upload finishes is great, but it’s often a missed opportunity. Think of YouTube’s visibility settings as powerful tools, not just the final checkboxes you tick before you’re done. Learning how to use Private, Unlisted, and Public settings properly gives you a ton of control over your content and how you serve your audience.
This is about more than just hiding a video; it's about being intentional with who sees your content and when. These settings can turn your channel from a simple broadcast platform into a much more versatile communication tool.
Choosing the Right Visibility Setting
Each visibility option has a specific job, and knowing which one to use for what situation will make your life a whole lot easier. It all comes down to matching the setting to your goal for that particular video.
Here’s how creators use them in the real world:
- Private: This is your digital vault. A creator might use ‘Private’ videos to give their paying Patreon members exclusive early access to a new series. For example, a podcaster could share the video version of an episode with top-tier patrons a week before it goes public.
- Unlisted: This is perfect for sharing without shouting about it. Many creators use 'Unlisted' videos to get feedback from a brand sponsor before a video goes live. Anyone with the link can watch, but it won’t show up in search results, on your channel, or in subscriber feeds.
- Public: This is the default for most of us who are trying to grow a channel. The moment you hit publish, the video goes live for the entire world to see and gets picked up by YouTube for search and recommendations.
Key Takeaway: Think of visibility as a tiered access system. Use 'Private' for super-exclusive previews, 'Unlisted' for controlled sharing (like with a brand partner or your email list), and 'Public' for maximum reach. This strategic approach to how you upload a video to YouTube puts you in complete control.
The Power of a Consistent Schedule
Beyond just who can see your video, when they see it is probably the most powerful tool you have for building momentum. Scheduling lets you batch-produce your content—you can film and edit a bunch of videos at once—and then have them roll out on a predictable calendar. This isn't just a great way to avoid the stress of a last-minute upload; it builds real anticipation with your audience.
When your subscribers know a new video drops every Friday at 6 PM, they start to build a habit around your channel. A creator making content for professionals, like Ali Abdaal, might schedule his productivity tips for weekday mornings to catch people on their commute. On the flip side, a gaming channel will probably aim for Friday evenings when their audience is settling in for the weekend.
Consistency is a huge signal, both to your audience and to the YouTube algorithm, that your channel is active, reliable, and worth paying attention to.
https://www.youtube.com/embed/AF1bUP3dVB4
Finding Your Channel's Prime Time
So, when is the best time to actually schedule your upload? The honest answer is, it completely depends on your audience. The best place to start is your own YouTube Analytics.
Jump into the 'Audience' tab, and you'll find a brilliant little chart that shows you exactly when your viewers are most active on the platform. This data is gold. It stops you from guessing and shows you the precise days and hours your community is online and ready to watch. For a deeper dive, our guide on the best time to post on YouTube breaks this down even further.
That said, general patterns can give you a solid starting point. Research looking at the United Kingdom, for example, has shown that the window from 2 PM to 4 PM GMT can be a real sweet spot for engagement. This often lines up with when people in the UK are taking a late lunch or afternoon break, making it a perfect time to grab their attention. You can find more insights on these UK-specific posting times on recurpost.com.
By mixing what you see in your own analytics with these broader trends, you can build a publishing schedule that gives every single video the strongest possible start.
What To Do The Moment Your Video Goes Live
You’ve hit the publish button. It feels like the end of the road, but in reality, the journey is just beginning. What you do in the first few hours after your video is live can make or break its chances of getting picked up by the algorithm. It's time to switch from creator mode to promoter mode.
This isn't about obsessively refreshing your analytics page. It's about being strategic. Your goal is to kickstart the conversation and give YouTube positive signals that people are interested in your content.
Your Golden Hour Checklist
That first hour is critical. You need to get the ball rolling and drive some initial traffic to show the algorithm your video is worth recommending.
Right away, jump into your comments and pin one. Don't just say, "Hope you enjoy!" Ask a thought-provoking question that directly relates to your video. For example, if you just posted a tutorial on making sourdough, you could pin a comment like, "What's the one sourdough mistake you keep making? Let's troubleshoot it together in the comments!"
This is a classic creator trick for a reason. It immediately shows new viewers what kind of conversation you want to have and gives them an easy way to join in.
Next, spread the word. Share your video on your other social platforms, but tailor the message for each one.
- Instagram Stories: A quick, exciting 15-second clip from the video with a "New Video" sticker is perfect for grabbing attention and getting that swipe-up.
- Twitter (X): Post the link along with a juicy quote or a controversial question from the video to get people talking.
- Facebook/Community Tab: This is where you can write a bit more. Give your followers some behind-the-scenes details or explain why you made this video to build a stronger connection and entice them to click.
This initial burst of external traffic is a powerful signal to YouTube's recommendation engine.
Tackling Those Post-Upload Problems
No matter how carefully you plan, things can go wrong after you upload a video to YouTube. Knowing how to handle the common hiccups without panicking is a skill every creator needs.
One of the most frequent stress-inducers is a video that seems permanently stuck "Processing HD version". This is especially common with 4K footage or longer videos. What’s happening is that the standard definition (SD) version goes live almost immediately, while the higher-quality versions are still being processed in the background.
Pro Tip: Whatever you do, don't delete and re-upload! The best fix is simply to be patient. To avoid this entirely, I always upload my videos as 'Unlisted' first. I wait until I can see that the HD and 4K versions are fully processed and ready, and only then do I switch the video to 'Public'. This guarantees every viewer gets the best possible quality from the very first second.
Another headache is the dreaded copyright claim, usually flagged automatically by Content ID for a piece of background music. Your first instinct might be to delete the video, but that should be your absolute last resort.
Instead, go to that video in your YouTube Studio and find the "Checks" section. YouTube gives you a few powerful tools to fix this without scrapping your work:
- Trim out segment: You can simply snip out the part of your video that contains the copyrighted audio.
- Replace song: Swap the flagged track for a royalty-free one directly from YouTube's own Audio Library.
- Mute song: If the music isn't critical, you can just mute that specific audio track, leaving your voiceover and other sounds intact.
If you genuinely believe the claim is an error—for instance, you have a licence for the music—you can also file a dispute right from this screen. These built-in tools are designed to solve the problem quickly so you don't lose all that valuable early momentum.
Got Questions About Uploading to YouTube?
Even with a perfect plan, you're bound to run into a few head-scratchers during the upload process. It’s easy to get bogged down by a technical issue, but the good news is that most common problems have surprisingly simple fixes. We’ll walk through the questions that pop up time and time again for creators, so you can get unstuck and get back to creating.
From file size caps to navigating sensitive content, getting your head around these details will make uploading a breeze. Let's clear up some of the usual suspects.
Just How Big Can My YouTube Video File Be?
This is a classic, and thankfully, the answer is massive. If your YouTube account is verified, you can upload a video file that’s up to 256 GB or 12 hours long – whichever you hit first.
Honestly, you’ll probably never get close to that limit. A standard 10-minute video in 1080p usually clocks in at around 1-2 GB. Even a feature-length film in glorious 4K would have a hard time maxing out that 256 GB ceiling. The real takeaway here isn't to worry about the file size itself, but to focus on exporting your video at the highest quality your internet can comfortably manage.
Can I Swap Out a Video After I've Uploaded It?
This one’s a hard no, unfortunately. Once a video is on YouTube, you can't replace the actual video file. The only way to do it is to delete the original and upload the new version from scratch. And that’s a big deal – deleting a video erases all its hard-earned watch time, views, and comments forever.
This is exactly why so many creators have a rock-solid pre-publish checklist.
A Creator's Workflow Example:
Imagine a popular UK-based cooking channel like Sorted Food. They might upload their weekly recipes as 'Unlisted' first. Then, they could send that private link to their team for a final pair of eyes. This simple step helps them catch tiny editing mistakes or audio glitches before their huge audience ever sees it, saving them from having to delete a video that’s already started getting traction.
If you do spot a small mistake after publishing, you’re not totally out of luck. YouTube’s own editor lets you make basic changes, like trimming a section or replacing the audio, without losing your URL or analytics.
What's the Deal with Age Restrictions?
YouTube has Community Guidelines to protect younger viewers, and they take them seriously. If your video contains content that isn't suitable for all ages—think strong language, violence, or other mature themes—you need to apply an age restriction yourself when you upload.
Forgetting to do this can lead to YouTube stepping in and adding one for you. In worse cases, it could even lead to a community guideline strike against your channel. It’s always better to be proactive.
A history documentarian, for instance, covering a battle with graphic descriptions would manually set an age restriction. Sure, this limits the potential audience and turns off monetisation for that video, but it keeps the channel in good standing with YouTube. It’s about making a responsible call that puts platform safety first.
Ready to stop guessing and start creating videos your audience is guaranteed to love? Vidito uses AI to generate dozens of data-backed video ideas tailored for your channel in seconds. Know which topics will go viral before you even press record by visiting Vidito's official website to start your free trial.